CMCA Members' Portal
GeoWiki X FAQs
How to perform a quick search:
When you are on the GeoWiki X homepage, you can perform a quick search. Simply begin typing a point of interest or town name into the white box, followed by the orange magnifying glass and the results for your search will be displayed in a list.

How to submit a new point of interest:
1. Click ADD NEW POINT OF INTEREST
2. Complete the place details, filling in as much information as you can. The fields marked with an asterisk are compulsory and you must supply this information
3. Click into the boxes next to ACTIVITIES and FACILITIES to indicate what is available at this location
4. Click on Add Point of Interest.
NB: Primary latitude and longitude refers to the physical location of the point of interest. Secondary latitude and longitude refers to the entrance or turn off to where that point of interest is located. I.E. Primary latitude is the physical location of the dump point within a showground. Secondary latitude is the entrance to that showground.
Your point of interest will now be forwarded to the administration portal for verification and approval.
How to search by keyword:
1. Click on SEARCH BY KEYWORD

2. Begin typing keywords relevant to a location. For example, RV Park
3. Click on the magnifying glass
The points of interest containing that key word will now be listed.
How to search by map:

2. Search by town by typing the name into the search bar located in the top right-hand corner of the map
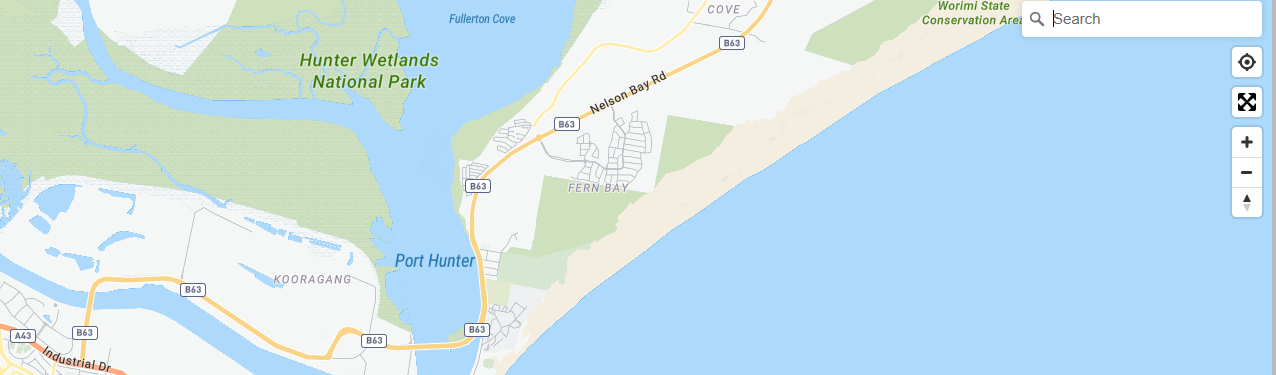
3. Wait for drop-down box and click on the town name as it appears in the list
4. The map will reposition to the location of that town. A number will appear in orange indicating how many points of interest are available within that town/region
5.Zoom in using your mouse or the plus symbol located on the map
6. The points of interest will now be displayed on a detailed street map
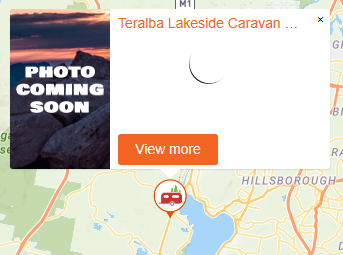
7. To read more about a point of interest, click on the icon, followed by the orange View more button.
NB: For all the search options listed above, you can filter your search so that only points of interests with these activities and facilities will display in the list or on the map.
How to plan a trip:
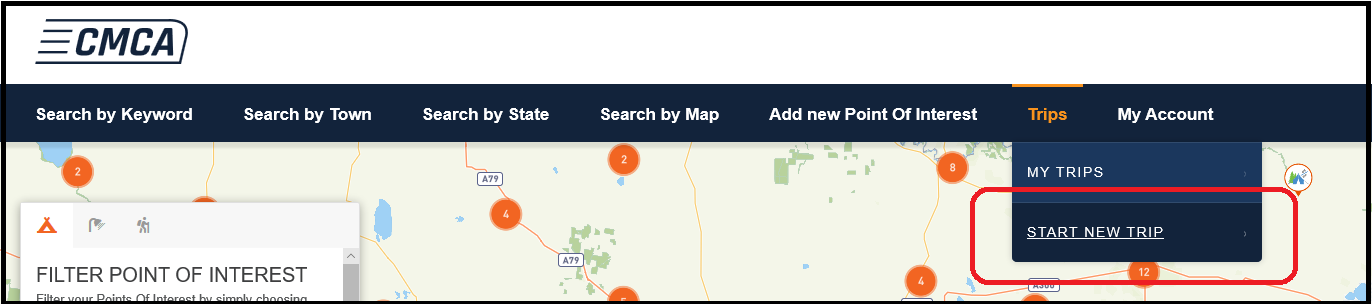
1. Hover your mouse over TRIPS and click on START NEW TRIP
2. Complete the trip details, filling in as much information as you can. The fields marked with an asterisk are compulsory and you must complete this information
3. Click on Add new trip to save your new trip information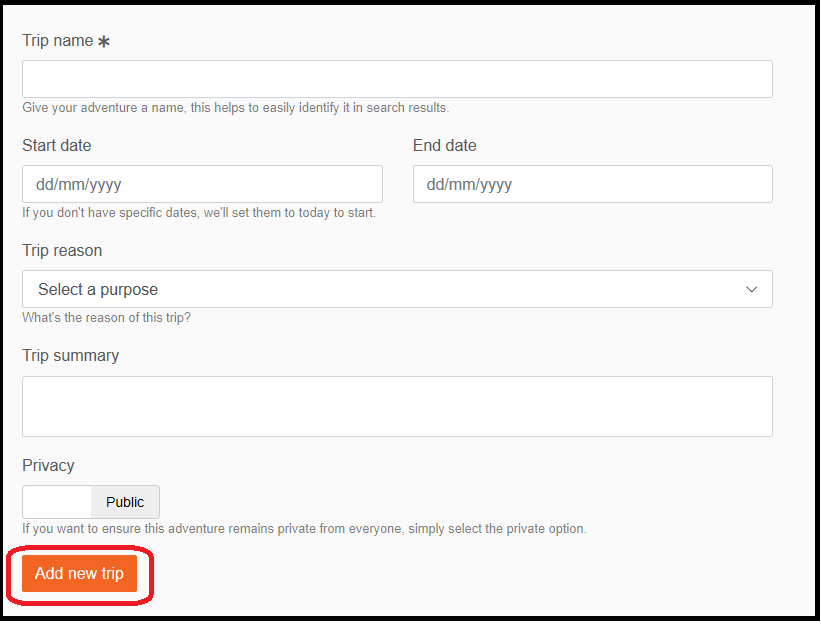
4. To add points of interest to your trip plan, click on the icons that are already situated on screen and hit the orange symbol with a plus sign. Or, search for a town in the top right-hand corner. From here, new icons will appear on screen and you can add these to your trip
5. Once you click on an icon and add it to your trip, complete the information that appears on screen. Eg, what trip you are adding this point of interest to (you may have multiple trips planned), the date you will be arriving, the length of stay and any notes you wish to add
6. Once you have added points of interest to your trip, you can review trip details, add images and print a preview by clicking on the orange tabs located to the left of the map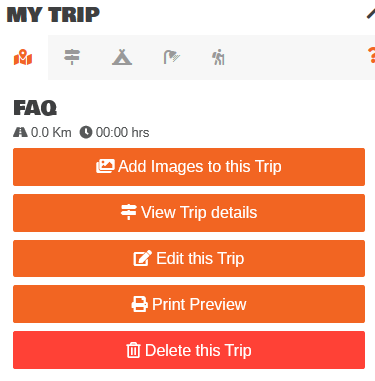 How to view an existing trip:
1. Hover your mouse over TRIPS and click on MY TRIPS
2. Click on View trip
Your trip will now appear on screen and you can add additional points of interests, review trip details, add images and print a preview.
How to add a review:
1. Once you have clicked on View More to read about a specific point of interest, simply click on Add Review which is located under the contact information

2. Select star rating, write your review and click Add Review again.
How to add Cost
1.Once you have clicked on View More to read about a specific point of interest, simply click on Add Cost which is located under the contact information
2. Fill out the cost name. E.g PWR PVPN
3. Complete short description. Eg. Powered site per vehicle per night (2 adults)
4. Add the value amount (you will not need to include the $ symbol)
5. Click on Add cost to forward your cost to the administration for approval.
How to add an image:
1. Once you have clicked on View More to read about a specific point of interest, simply click on Add Images which is located under the contact information

2. Drag and drop images to upload or click inside the box to upload files from your device. Accepted image types include jpeg, png, jpg, gif. Max 4mb per image
3. Click on Finished Image Uploads to forward your image to administration portal.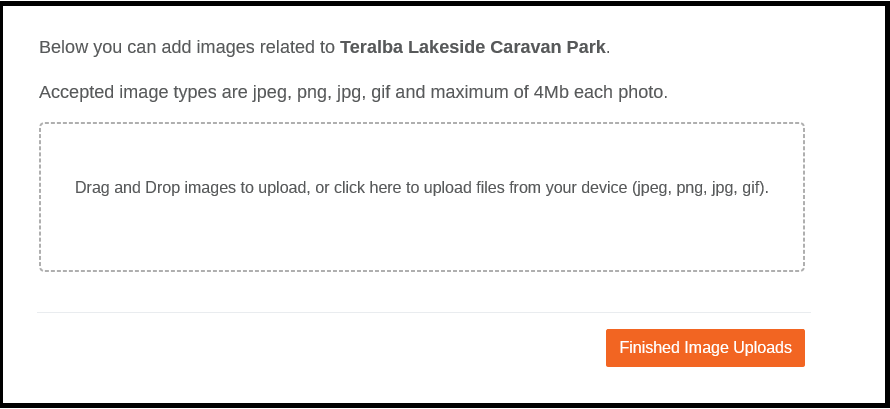
How to report a point of interest:
1. Once you have clicked on View More to read about a specific point of interest, simply click on Report this Point of Interest which is located under the contact information

2. Outline a reason and provide a description for the report and click on Report to forward your report to the administration portal for investigation.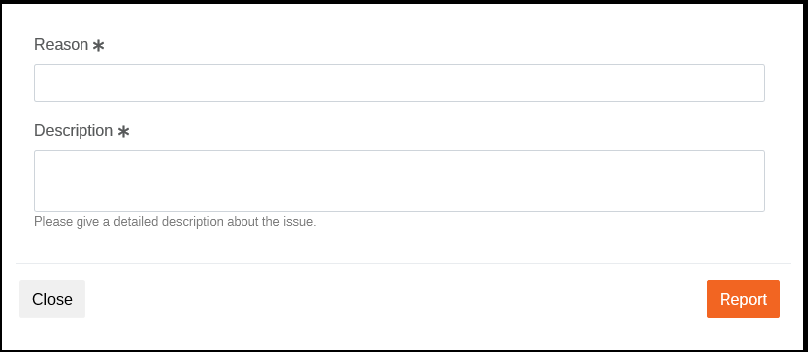
How to add a point of interest to your favourites list:
1. Once you have clicked on View More to read about a specific point of interest, simply click on Add to Favourites.
2. To view your favourite list, hover your mouse over MY ACCOUNT and click on MY FABOURITE PLACES
Your favourites will now appear in a list on screen.
How to add a new point of interest to your wishlist:
1. Once you have clicked on View More to read about a specific point of interest, simply click on Add to Wishlist.

2. To view your wishlist, hover your mouse over MY ACCOUNT and click on MY WISHLIST.
Your wishlist will now appear in a list on screen.
How to add a profile avatar:
1. Hover your mouse over MY ACCOUNT and click on PROFILE AVATAR
2. Simply drag and drop an image to upload, or click into the box to upload a file from your device (jpeg, png, jpg, gif)
![]()
3. If you already have an existing avatar and wish to replace this, simply click on Delete Avatar.
![]()
Page Last Updated: Tuesday, 25 February 2020 4:54 pm