CMCA - Campervan and Motorhome Club of Australia
CMCA Members' Portal

Frequently Asked Questions - GeoWiki X

Do you need assistance with GeoWiki X (both app and website versions)? Find the answers to your questions below. 

GeoWiki X is a repository of campgrounds, caravan parks, national parks, free camping sites, dump points and other points of interest required for travelling. GeoWiki X can be accessed online via the website or via the CMCA Connect app across selected Apple and Android devices. GeoWiki X allows for live database updates, member reviews, and the ability to upload and share photos of specific locations.

GeoWiki X can be accessed via the CMCA Connect app, which is available for download on select Apple and Android devices. Once the app is downloaded, members can log in using their CMCA username and password.
Additionally, members can visit the GeoWiki X website to access all its content. You can also access the website via the header over every webpage - on the right-hand side, there is a menu option that enables members to change between websites. Simply select the arrow and select GeoWiki X. From the Benefits website, place the cursor over the More button in the header and select GeoWiki X from the drop-down menu.

Simply use your Member Portal login details. If you are using GeoWiki X for the first time, please be aware that the GeoWiki X website and CMCA Connect app will not accept an email address as a username. If your current username is an email address, please contact geowiki@cmca.net.au and our staff will assist in changing your username. Alternatively, if you do not have login credentials our staff can set these up for you.

GPS instructions and downloads can be located HERE.

We advise all members to uninstall/delete the old GeoWiki app. GeoWiki X now lives in the CMCA Connect app as mentioned above. The old app will no longer receive updates.
If you're experiencing another problem, call our staff on 02 4978 8788.

GeoWiki X App Version

Do you need assistance with GeoWiki X app version? Find the answers to your questions below. 

1. Tap on the Search button located at the bottom of the page (you will know that you have selected search as the icon will turn orange)
2. Tap on By Name and begin typing name of the point of interest (POI)
3. When the name of the POI appears on screen, tap on it, followed by View on map or View more.
View on map will show where the point of interest is located on a map and View more will display more information on that site including address, contact details, reviews, costs and navigation options.

1. Tap on the Search button located at the bottom of the page. (You will know that you have selected search as the icon will turn orange)
2. Tap on By Town/Suburb and begin typing
3. A list will appear, and from here, simply click on the name of the town or suburb. A cluster map will then appear on screen displaying the number of POIs available within that town or suburb. Zoom in to separate the icons and to view the different points of interest that are available.

1. Tap on the hamburger button located in the top left-hand corner of GeoWiki X
2. Tap on the quick filter you wish to use and a map will appear on screen. You will know that specific filter has been turned on as an orange bar will display across the top of the map outlining what filter is currently switched on
3. To turn off quick map filters, tap the hamburger button again, followed by Show everything (reset).

1. Tap on the funnel icon located in the top right-hand corner of GeoWiki X
2. Turn off the switches next to locations you don’t wish to come up in your searches. (You can switch off all icons at once by tapping Disable all or you can turn them all back on by tapping Reset all)
Please note: Facilities and Interests are more detailed filters to apply to Locations, which is why you cannot select either without first selecting a Location (or more). Selecting multiple facilities at once will try and apply ALL those facilities to a location, meaning a location must tick all those boxes to show up on a map.

1. Tap on the hamburger icon located in the left-hand corner of GeoWiki X
2. Scroll down and tap on Add new point of interest
3. Enter POI name (for example: Newcastle Showground) and complete the required fields. Please attempt to include as much information as possible for the moderators. If you do not know the lat/long, simply supply the address. Remember to scroll through the entire list of facilities and activities and select what is available at that point of interest
4. Tap on Save POI and your point of interest will be submitted to the administration portal for approval.

1. Tap on the hamburger icon located in the left-hand corner of GeoWiki X
2. Scroll down and tap on Map settings
3. Switch on/off settings that you wish to see/not see on your map (this will include lat/long display settings, 3D mapping and the ability to tilt and rotate the map)
4. Tap the back arrow to go back to map.

1. Tap on the hamburger icon located in the left-hand corner of GeoWiki X
2. Tap on Map downloads
3. Tap on the orange Activate button
4. From here, download each state individually by tapping Download. You will know what state is downloaded as it will switch to Installed.
There is no need to manually switch on offline maps. The maps will automatically turn to offline capability when you are not connected to the internet. Similarly, the maps will default to offline when you are connected to the internet so that you are not using data.

1. Tap on the hamburger icon located in the left-hand corner of GeoWiki X
2. Scroll down and tap on Data update – Sync
3. Tap on Sync now and wait for download to complete or;
4. Switch on Auto-sync (this means your device will automatically sync every 7 days and have the most up to date information available)

1. Tap on NEAR ME located at the bottom of GeoWiki X (You will know that you have selected places nearby as the icon will turn orange)
2. Tap on Sort by name to display points of interests that are nearby in alphabetical order, or Sort by distance to display points of interest nearby calculated by distance.

1. Tap View more on an icon
2. Tap on orange box stating Add to favourites. You will know this has been added as Favourite added successfully will appear on screen
3. To view your Favourites, tap on icon located at the bottom of GeoWiki X (You will know that you have selected favourites as the icon will turn orange).

1. Tap on Trips located at the bottom of GeoWiki X (You will know that you have selected planner as the icon will turn orange)
2. Tap on orange plus symbol located in the bottom right corner of the map
3. Enter details such as trip name, start and end date, trip reason and trip summary
4. Tap on SAVE TRIP.

1. Open the information section for the desired location
2. Tap on Add to Trip
3. Tap on the box with trip name and if one, scroll through and select desired trip, followed by add. From here, add the date you will be arriving at the point of interest, the length of stay and any notes. Tick if you wish for this point of interest to be your starting point
4. Tap on SAVE DESTINATION.

Please note, destinations can be added to a trip at any stage simply by clicking on a POI and tapping Add to trip. 

1. Tap on Trips, followed by the trip name
2. Tap on Trip details
3. Tap on Destinations
4.Tap on Reorder Destinations
3. Hold your finger on the double headed arrow and move the destination up or down depending on the order you wish for it to appear. The destination positioned at the top of the list will be your starting point.

1. Tap on Trips, followed by Map
2. A map will appear with a blue line indicating the distance between your destinations. The number that appears is the order of which you will be arriving at these destinations
3. Tap on the flag to add a custom destination to you trip
4. Tap on the pin marker to remove all points of interest (other than the destinations on your trip).

1. Click on the satellite icon located on the map. This will switch your map to either satellite or standard map.

1. Open the information section for the desired location
2. Select the second heading along the top Reviews
3. Tap on Add new review
4. From here, tap on the number of stars you feel are appropriate for that point of interest, enter in a review description and tap on Save Review. Your review will be submitted to the administration portal for approval. Please note: Reviews are to contain 15 characters or more.

1. Open the information section for the desired location
2. Select the third heading along the top Costs
3. Tap on Add new cost
4. Enter in the cost details.
5. Cost Name: This is the short-hand description of the cost you are submitting. I.E. PWR PVPN. Description: Here you will write out the full description of the cost you are submitting. I.E. Powered site per vehicle per night (2 adults). Cost ($): Enter the cost amount here. Do not include dollar symbol.
6. Tap on Save cost. Your cost will be submitted to the administration portal for approval.

1. Open the information section for the desired location
2. Select the fourth heading along the top Photos
3. Tap on Take Photo to take a new photo or Attach Photo to add a photo from your device album.

1. Open the information section for the desired location
2. Tap on Report this POI
3. Add a reason and description of the issue and tap on Send. Your report will be submitted to the administration portal for approval.

GeoWiki X Web Version

Do you need assistance with GeoWiki X web version? Find the answers to your questions below. 

When you are on the GeoWiki X homepage, you can perform a quick search. Simply begin typing a point of interest or town name into the white box, followed by the orange magnifying glass and the results for your search will be displayed in a list.

1. Click ADD NEW POINT OF INTEREST

2. Complete the place details, filling in as much information as you can. The fields marked with an asterisk are compulsory and you must supply this information3. Click into the boxes next to ACTIVITIES and FACILITIES to indicate what is available at this location
4. Click on Add Point of Interest.
NB: Primary latitude and longitude refers to the physical location of the point of interest. Secondary latitude and longitude refer to the entrance or turn off to where that point of interest is located. I.E. Primary latitude is the physical location of the dump point within a showground. Secondary latitude is the entrance to that showground.
Your point of interest will now be forwarded to the administration portal for verification and approval.

1. Click on SEARCH BY KEYWORD
2. Begin typing keywords relevant to a location. For example, RV Park
3. Click on the magnifying glass
The points of interest containing that key word will now be listed.

1. Search by town by typing the name into the search bar located in the top right-hand corner of the map

2. Wait for drop-down box and click on the town name as it appears in the list
3. The map will reposition to the location of that town. A number will appear in orange indicating how many points of interest are available within that town/region
4. Zoom in using your mouse or the plus symbol located on the map
5. The points of interest will now be displayed on a detailed street map
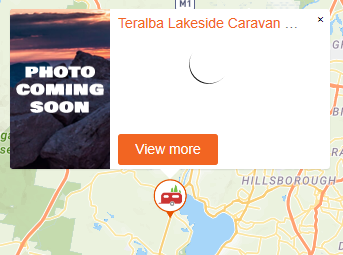
6. To read more about a point of interest, click on the icon, followed by the orange View more button.
NB: For all the search options listed above, you can filter your search so that only points of interests with these activities and facilities will display in the list or on the map.

1. Hover your mouse over TRIPS and click on START NEW TRIP

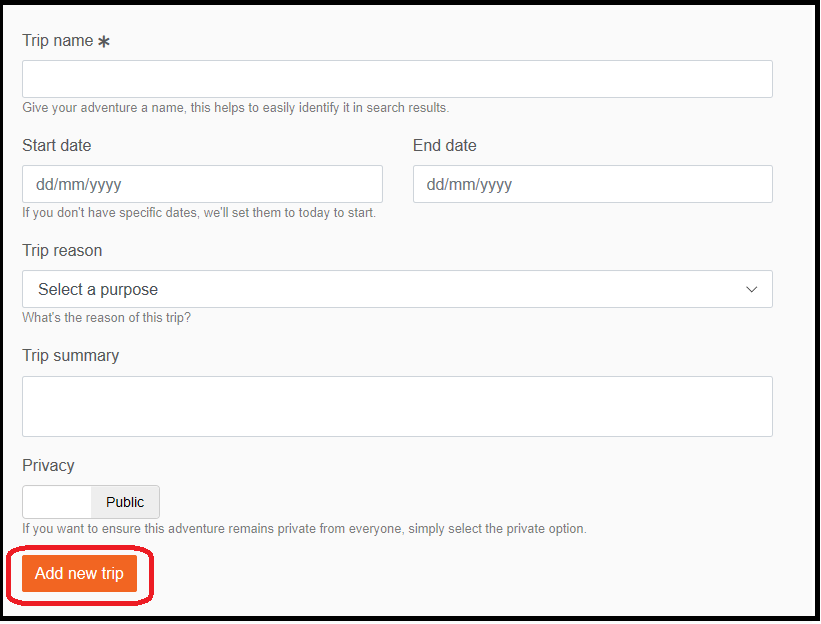
2. Complete the trip details, filling in as much information as you can. The fields marked with an asterisk are compulsory and you must complete this information
3. Click on Add new trip to save your new trip information

4. To add points of interest to your trip plan, click on the icons that are already situated on screen and hit the orange symbol with a plus sign. Or, search for a town in the top right-hand corner. From here, new icons will appear on screen and you can add these to your trip
5. Once you click on an icon and add it to your trip, complete the information that appears on screen. Eg, what trip you are adding this point of interest to (you may have multiple trips planned), the date you will be arriving, the length of stay and any notes you wish to add
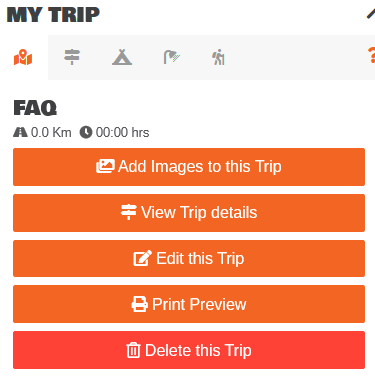
6. Once you have added points of interest to your trip, you can review trip details, add images and print a preview by clicking on the orange tabs located to the left of the map

1. Hover your mouse over TRIPS and click on MY TRIPS
2. Click on View trip
Your trip will now appear on screen and you can add additional points of interests, review trip details, add images and print a preview.

1. Once you have clicked on View More to read about a specific point of interest, simply click on Add Review which is located under the contact information
2. Select star rating, write your review and click Add Review again.

1.Once you have clicked on View More to read about a specific point of interest, simply click on Add Cost which is located under the contact information
2. Fill out the cost name. E.g PWR PVPN
3. Complete short description. Eg. Powered site per vehicle per night (2 adults)
4. Add the value amount (you will not need to include the $ symbol)
5. Click on Add cost to forward your cost to the administration for approval.

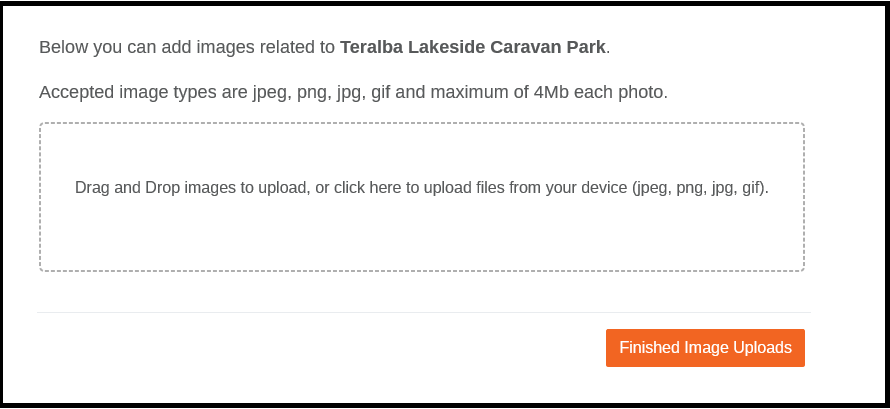
1. Once you have clicked on View More to read about a specific point of interest, simply click on Add Images which is located under the contact information
2. Drag and drop images to upload or click inside the box to upload files from your device. Accepted image types include jpeg, png, jpg, gif. Max 4mb per image
3. Click on Finished Image Uploads to forward your image to administration portal.

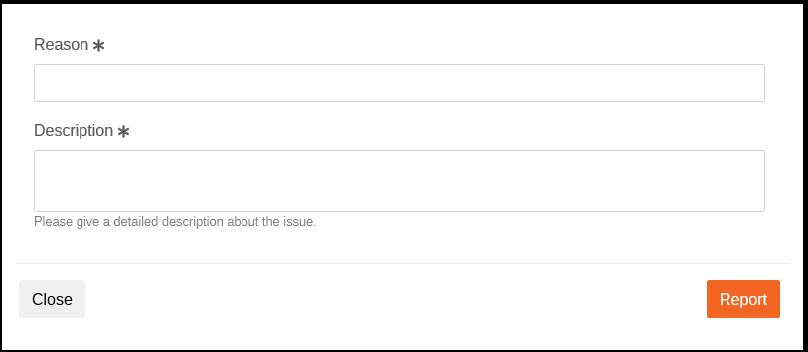
1. Once you have clicked on View More to read about a specific point of interest, simply click on Report this Point of Interest which is located under the contact information
2. Outline a reason and provide a description for the report and click on Report to forward your report to the administration portal for investigation.

1. Once you have clicked on View More to read about a specific point of interest, simply click on Add to Favourites.
 
2. To view your favourite list, hover your mouse over MY ACCOUNT and click on MY FABOURITE PLACESYour favourites will now appear in a list on screen.

1. Once you have clicked on View More to read about a specific point of interest, simply click on Add to Wishlist.
2. To view your wishlist, hover your mouse over MY ACCOUNT and click on MY WISHLIST.
Your wishlist will now appear in a list on screen.

1. Hover your mouse over MY ACCOUNT and click on PROFILE AVATAR
2. Simply drag and drop an image to upload, or click into the box to upload a file from your device (jpeg, png, jpg, gif)

3. If you already have an existing avatar and wish to replace this, simply click on Delete Avatar.

Page Last Updated: Wednesday, 30 March 2022 2:15 PM, Session: Public